Atbay Candle

dsc00503-2.jpg

At Atbay we believe that as a society we are spending too much time on our technology, browsing Facebook, scrolling through Instagram, checking email, and so on. We are working towards a future where we have more control over how we spend our time, and what we choose to do. To help realize this dream, we are working on Candle, a smartphone charger that rewards time spent offline, doing things that matter to you. I don't want to spend too much space here talking about the why, but if you're interested, check out our website heyatbay.com and get on our mailing list for updates on our progress.

What I want to highlight most here is the prototyping power of having access to a maker space in Asheville. In just a few months we have been able to rapidly iterate on designs and as a result quickly move closer to a design we feel good about moving to production.

In the beginning I was using the laser cutter and lulzbot FDM 3d printer to create a basic cylindrical form with a button on top to provide the functionality we needed to test. We were able to quickly and cheaply produce five of these prototypes to give to test users and collect feedback to shape our next designs.

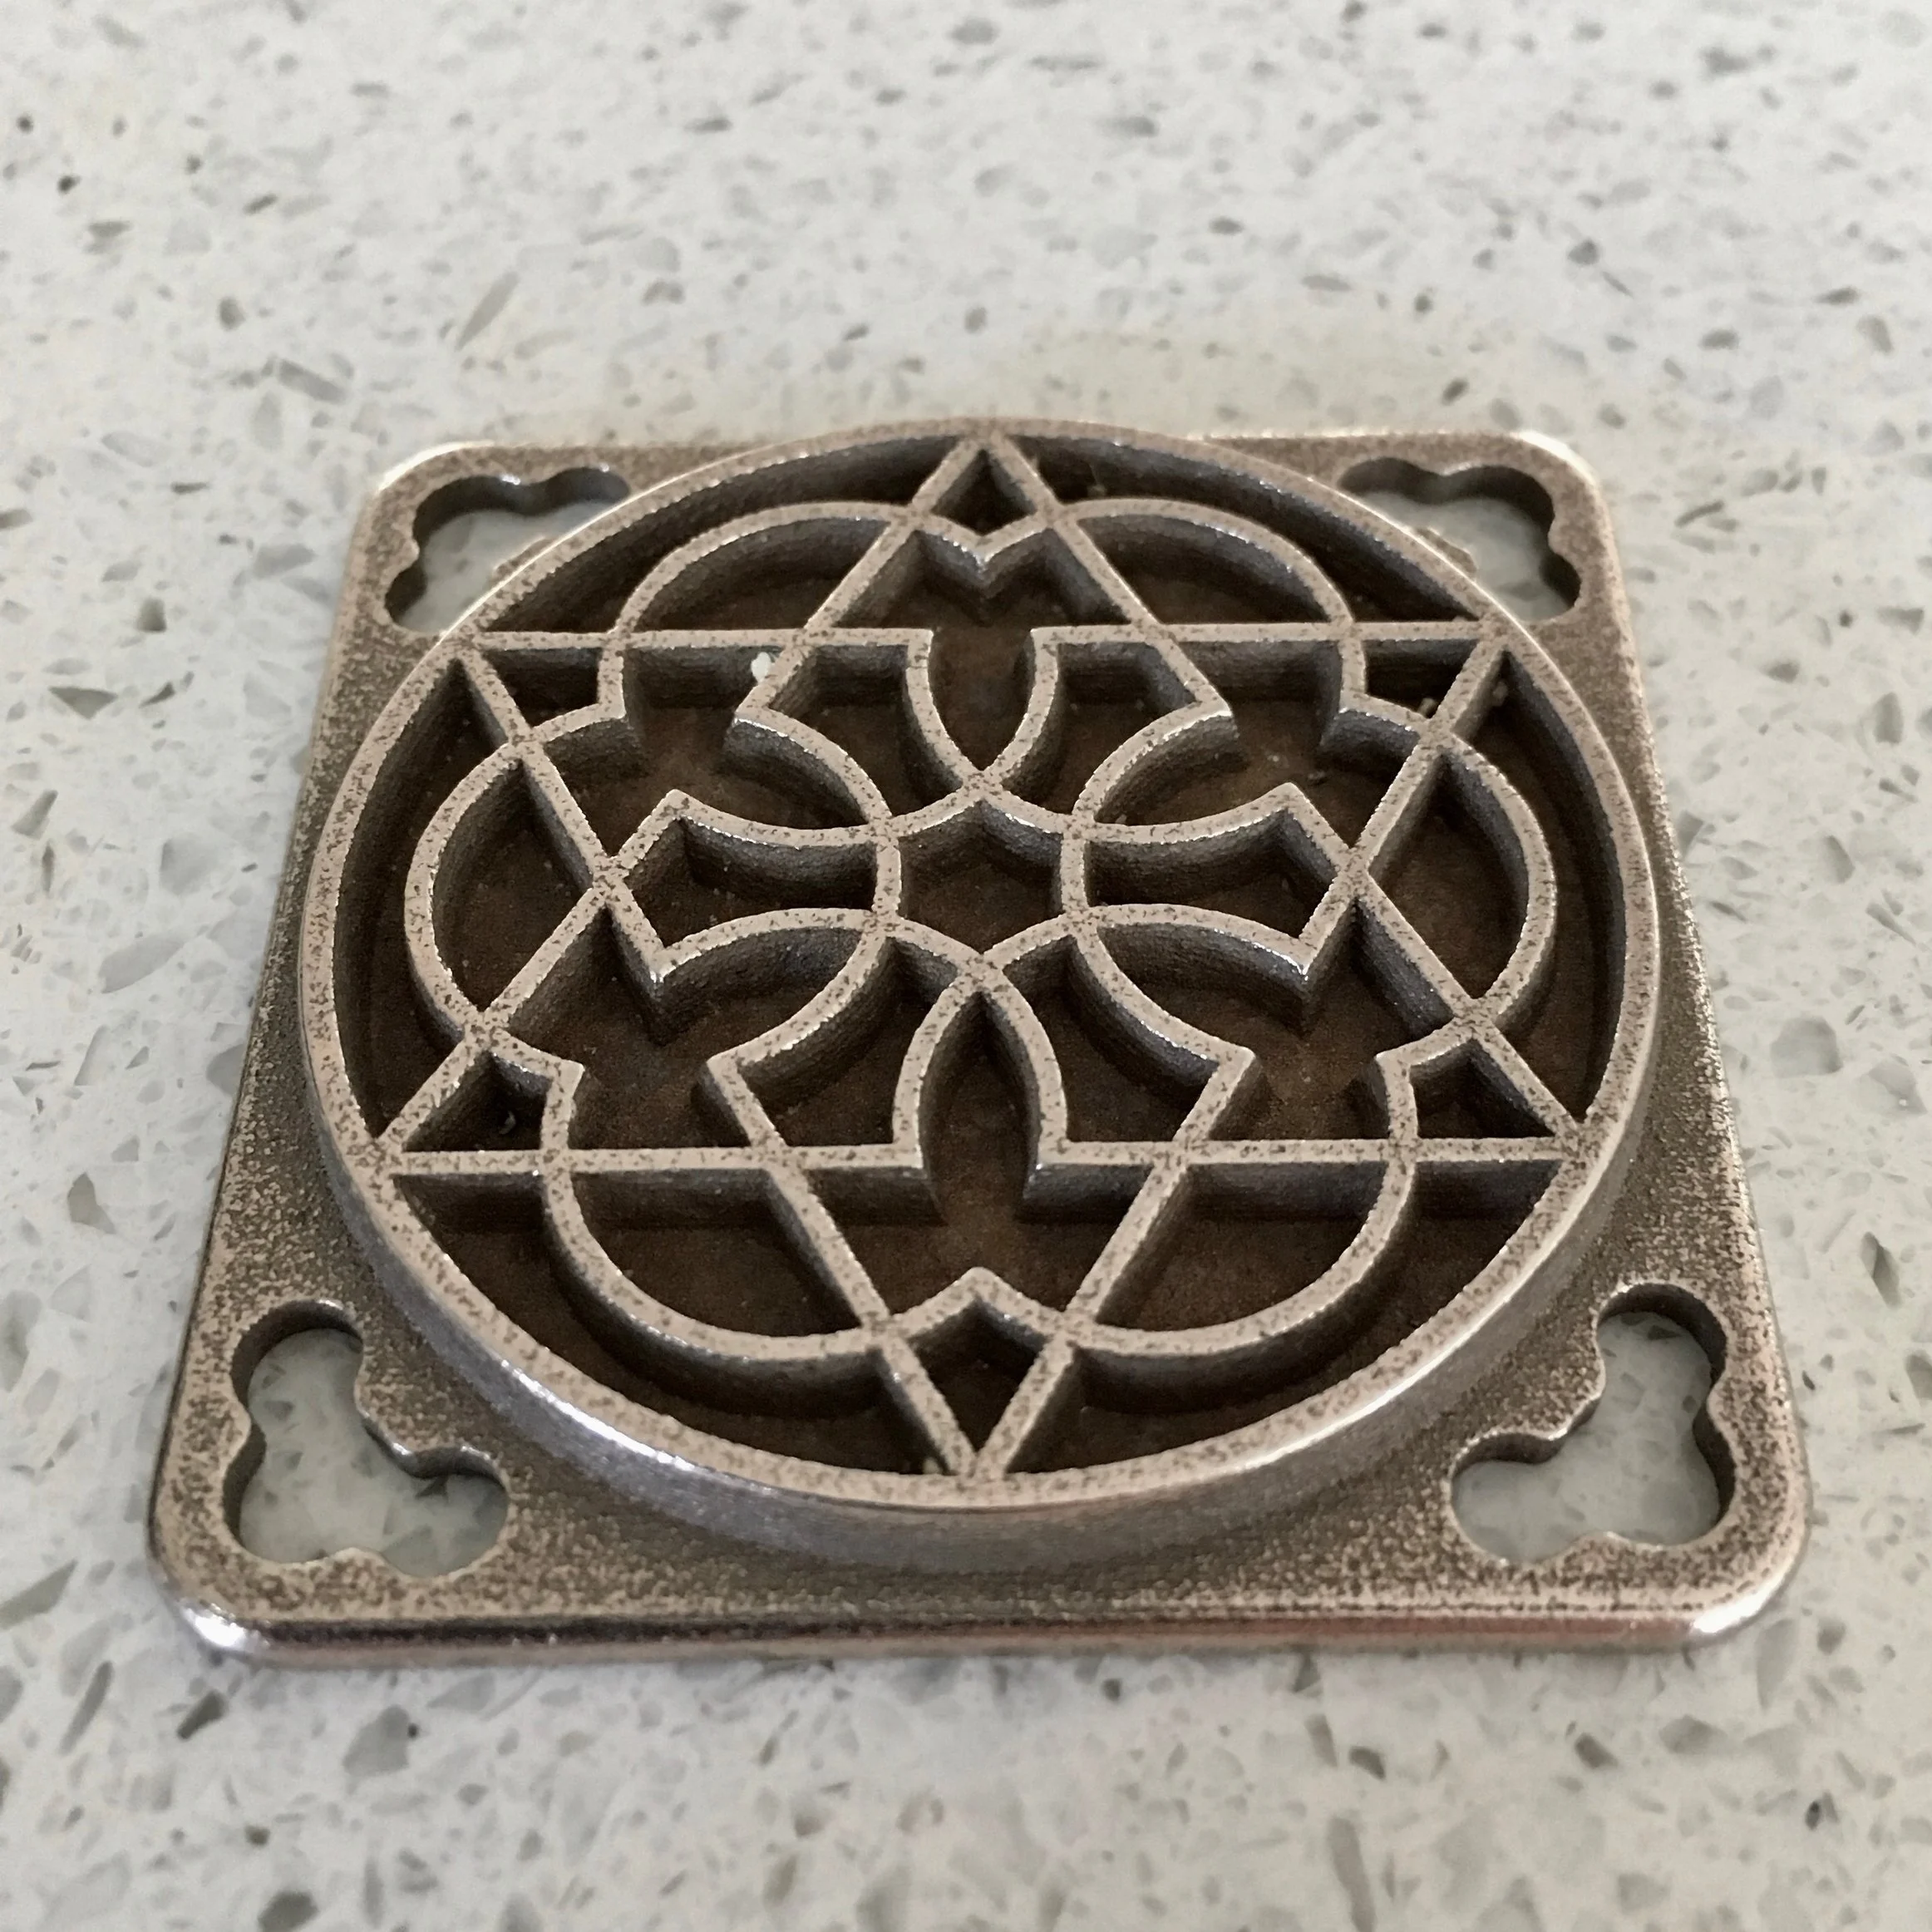
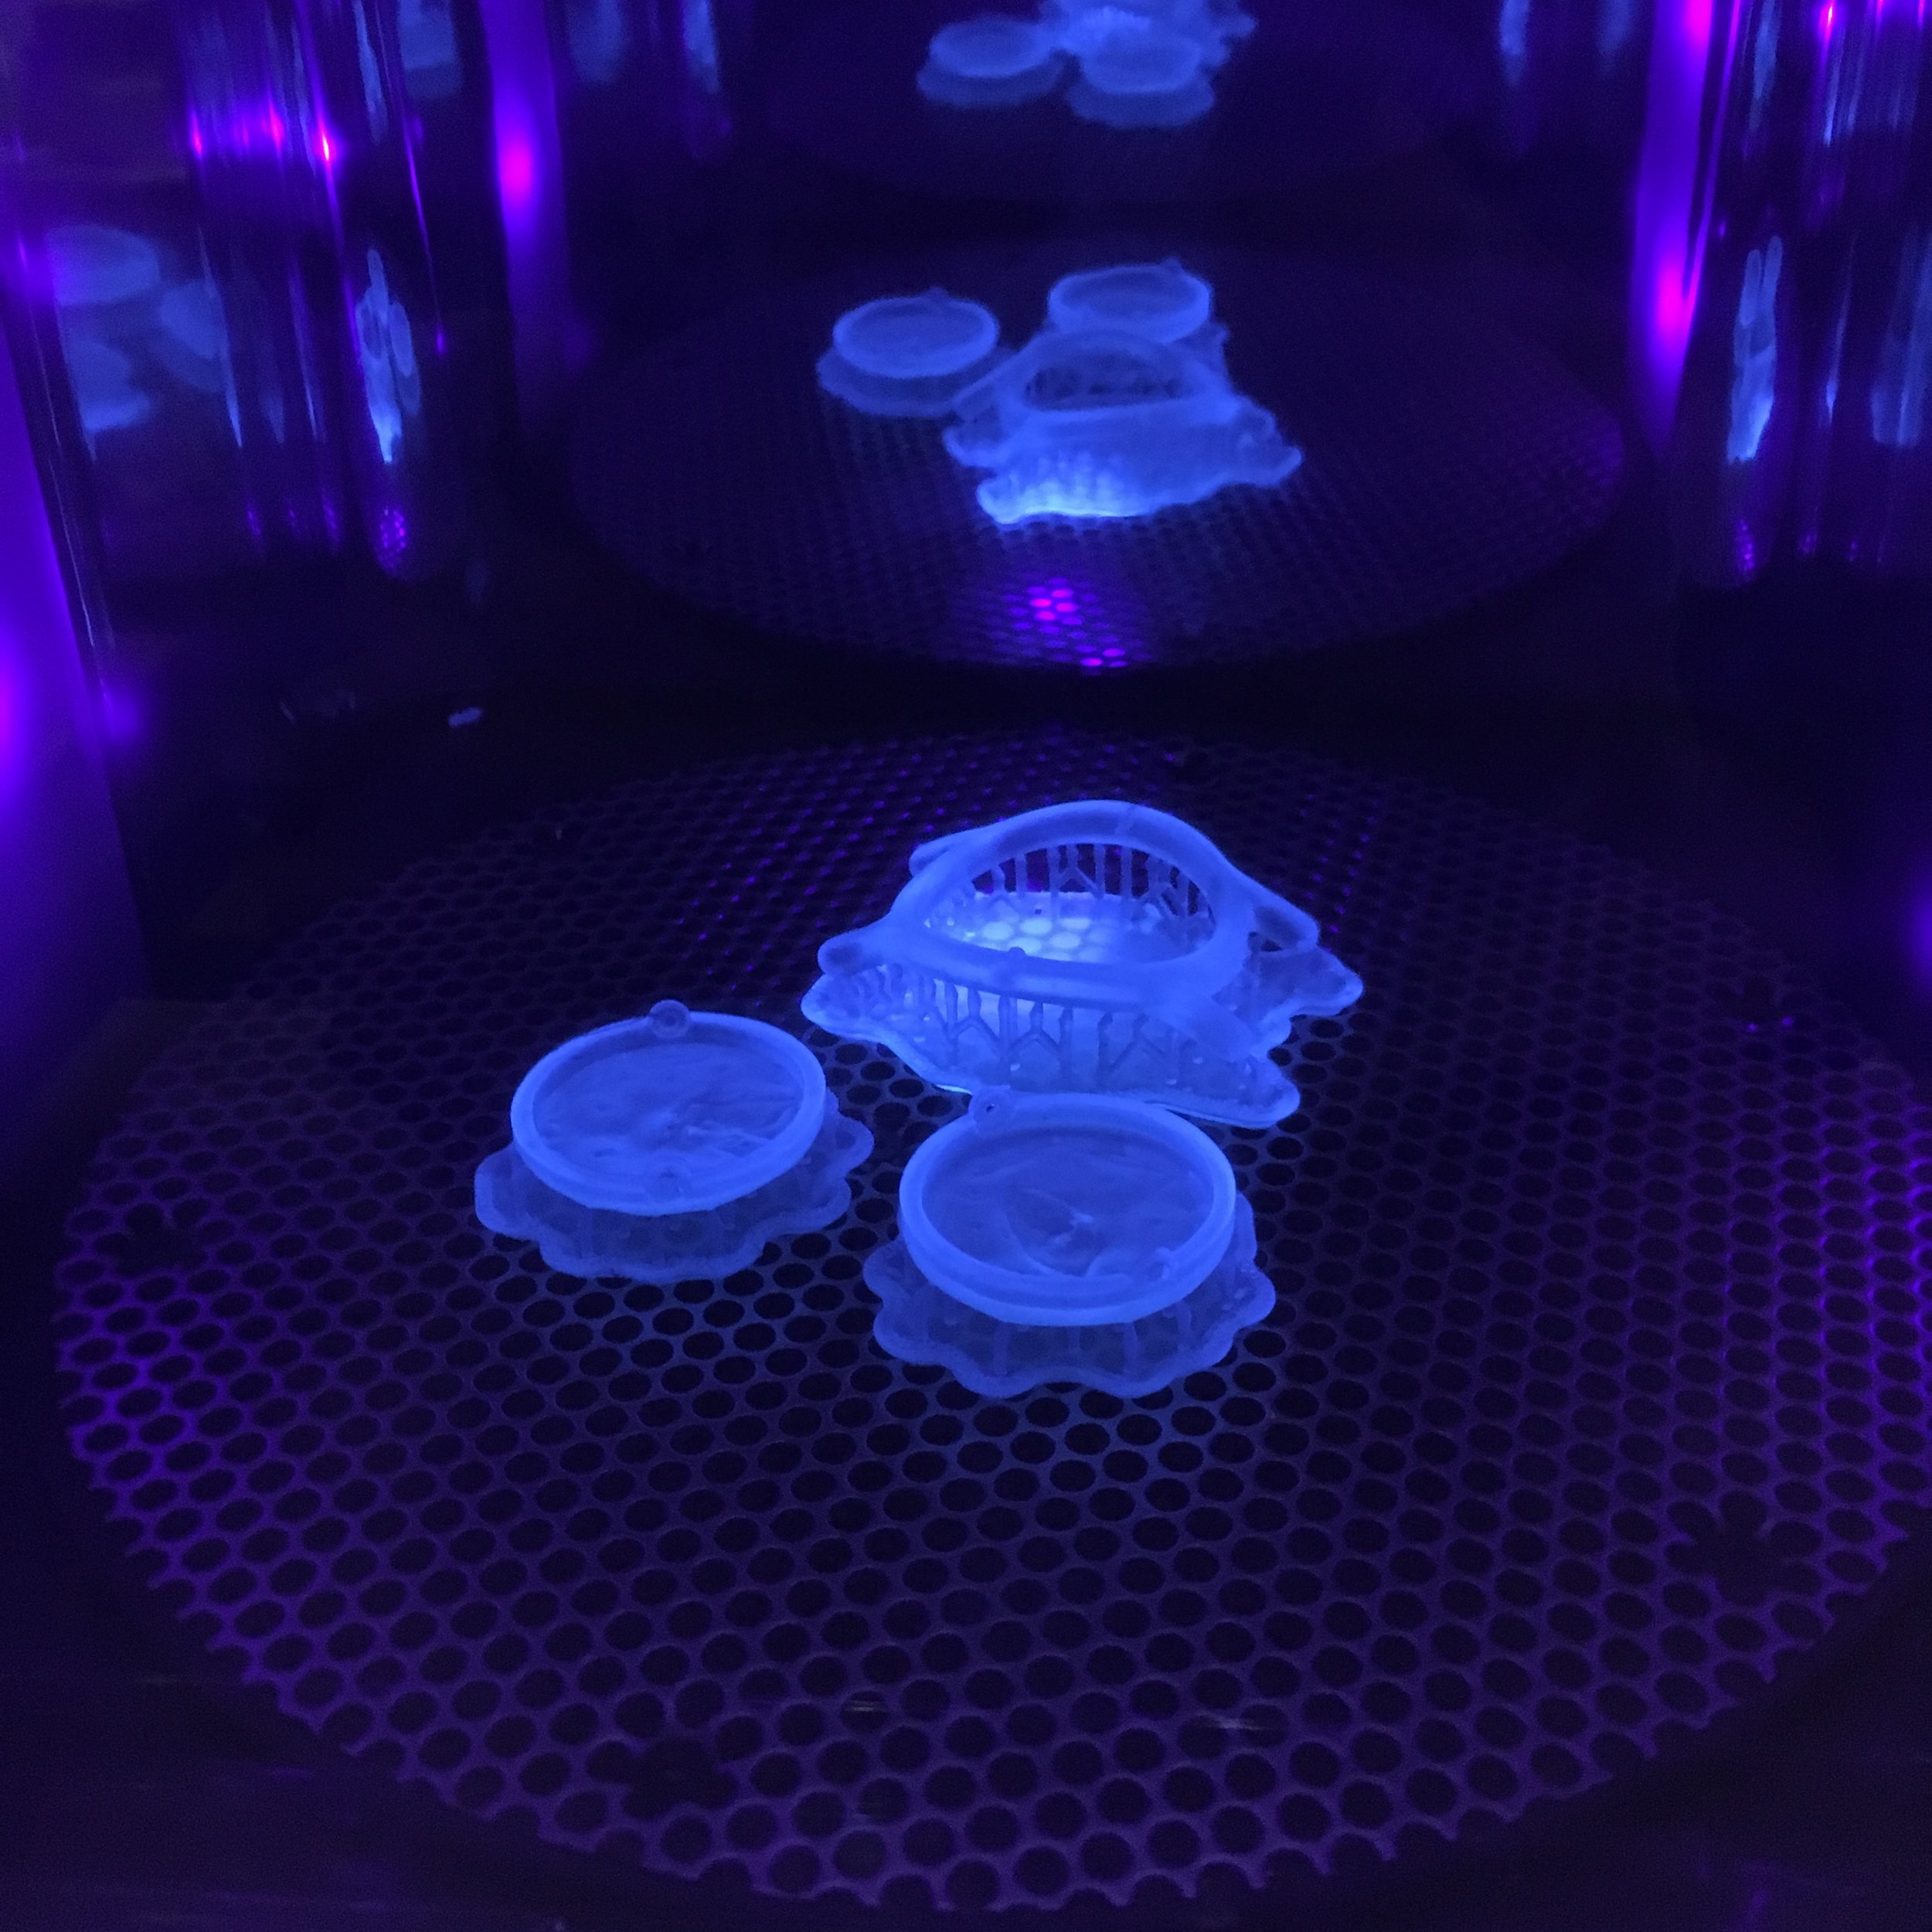
Recently I have been working more with the Form2 SLA 3d printer to create high resolution parts that more closely represent final part finish and quality. This is an excellent tool to create a beautiful prototype that functions as close to a production model as possible without cutting expensive tools.

In combination with these printed and laser cut parts, we have been using the arduino programming platform in conjunction with simple electronic development boards and parts to mock up the internal electrical components. Development boards come in all shapes and sizes these days, making it easier than ever to create beautiful prototypes that work exactly as they would sold in a store.

Our team still has a long way to go before we sell product at scale, but I hope this inspires you to get started on a project you've been thinking about! Feel free to reach out if you have any questions about our prototyping methods, or if you'd like help with your project.

IMG_5625.JPG
IMG_5788.JPG
IMG_5786 2.JPG
IMG_5839.JPG
IMG_5829.JPG

20 Sided Dice

IMG_5725.JPG

It's no secret among my friends that I like to game when I have the time.

That means I have to have my own set of dice!

I thought this would be an excellent opportunity to continue exploring the functionality of Fusion360. The 20d model ended up being a fair bit trickier than anticipated, and involved a lot of trial and error with the pattern tool. In the end it worked out, and now I have my very own hand crafted 3d model of a 20d.

I printed one version of the model on the Form2 at the maker space in the durable material, but decided I wanted something heftier. I had some credit on my Shapeways account and decided to shell out the big credits to print the 20d in steel! I think it turned out great, and the added heft feels great in hand.

My next step is to print a mold to fit around the metal part so I can pour clear resin in the void in the middle to add numbers... I have high hopes for how it will turn out.

IMG_5632.JPG
IMG_5717 2.JPG
IMG_5727 2.JPG

Mechanical Watch Prototype

IMG_5857 5.JPG
IMG_5856 7.JPG

To continue with the watch theme, I've starting working on another one! And before the first one is completely finished... Sometimes that's just how personal projects work.

With the addition of the Form2 3D printer in the maker space, thanks to a very generous donation, we now have the ability to print all sorts of high resolution parts in finishes and materials not possible with traditional FDM processes.

For this watch I wanted to highlight the capability of the Form2 to print in clear. This is an excellent material for lenses, lighting, or mechanical watches! This is round one of the clear watch, and I am very happy with the results. The next time I get around to ordering watch components I'll be able to get the necessary parts to finish both watches.

Freshly printed parts on the Form2 need to be washed and then cured under UV light

Freshly printed parts on the Form2 need to be washed and then cured under UV light

Pendants

IMG_5859.JPG
IMG_5860.JPG

I've been trying to figure out what to do with some hardwood scraps that have been slowly growing a pile in my storage box...

I decided to explore the combination of laser cutting and resin pouring to create small pieces of jewelry. The pieces shown are proof of concept to get a feel for some of what can be done with this process. I'm not generally a huge fan of using two part resins and epoxies, due to the hard to dispose of trash that results, but I am quite happy with the results of this experiment. The epoxy I used had no problem adhering to the charred edge of the fairly thick oak scraps I cut in the picture below. With a little sanding, polishing, and some optional spray finish, the part turns out quite nicely! I'm not planning on doing any more of these at present, but it's always good to explore new processes.

IMG_5524.JPG
IMG_5526.JPG
IMG_5465.JPG

Xmas Part 2

IMG_5172.jpg

With the power of laser cutting technology, it has become easier than ever to make customized board games! The power of laser cutters really shines when you need a whole set of pieces or parts that are identical and/or have fine details. If you are feeling particularly creative, you can add more flair than is necessary, and the only costs comes in design time and configuring the machine! Better yet, for this particular board, I wanted it to feel somewhat natural, so instead of designing the grid on a computer, I drew what I wanted it to look like with pen on paper, took a picture, and converted it to vector art. In a matter of minutes I had a functional board in the exact copy of my drawing (scaled to the size I wanted). There are countless applications for a laser cutter, and this is only the beginning for me!

IMG_5166.jpg
First design on paper

First design on paper

Fresh off of the laser cutter

Fresh off of the laser cutter

Simple Hex Watch

HexWatch_VC10_Small_Mcmaster_Acrylic_2017-Dec-29_08-44-30PM-000_CustomizedView29843639499_jpg 2.jpg

I had been looking around for an inexpensive, simple, and thin watch for a few weeks when I realized that it would be more fun to build one on my own. By build, I really mean design, create, and assemble the housing to hold a prefabricated watch movement purchased online.

Over the course of a few weeks I decided on a simple hexagonal shape for the watch and built a model of it in Fusion360. This was my first major undertaking in the software, and proved to be a valuable introductory lesson to basic modeling in the new space. Ultimately, much of the modeling experience felt similar to SolidWorks, and is quite a powerful piece of free software to have on hand.

The final product didn't turn out a nicely as I would have liked, but showed me the capabilities of the lulzbot 3D printer and mystery laser cutter at the Asheville Maker Space. I am looking forward to making a version two sometime in the next few months!

Screen Shot 2017-12-29 at 3.53.57 PM.png
IMG_5077.jpg
IMG_5187.jpg
IMG_5186.jpg

Xmas Part 1

IMG_5179.jpg
IMG_5152.jpg

For Christmas this year I wanted to make my mom a useful tool using a process I have not tried before. In this case that process ended up being metal 3D printing. I took a quick picture of a design my mom had talked about wanting as a leather embossing tool, put together a quick design in Fusion360, and sent it off to their printers! I am very pleased with how the print turned out. I wasn't sure what the quality of the print was going to turn out like, but it seems to have come out with fairly crisp lines. Time will tell how it holds up as a functional tool!

 
A closer view of the print detail on the back side of the print

A closer view of the print detail on the back side of the print


Cast Silver Pendant

 
IMG_2897.jpg
 

A couple years ago I wanted to make a special gift for a special someone, and had the opportunity to use some of the small metal casting tools in the shop at 4moms. After carving the design in hard wax, I made a simple two part mold with a sand casting mold kit, melted down the metal (with assistance), and poured the part. It's a wonderful feeling opening a cast metal mold to see a new part turn out as you pictured it in your mind. After a little cleaning up it was ready to be worn, and is still done so to this day.

IMG_2886.jpg
IMG_2893.jpg